Day 4
Got in early and immediately set to work finishing the hands and arms – since Pityu is doing the painting, Peter and I don’t want to be the bottleneck that holds him up. So I got those ripped off pretty quick (using the dremel is starting to come a little more naturally) and rigged them up to the body. Peter was busy making the third elf’s head and gave me the task of carving the foam body.
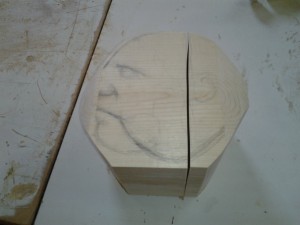
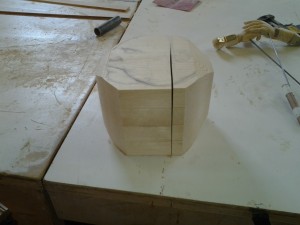
Judd also let me in on his process for creating the lead character. He starts with a big block made up of boards that had been planed and laminated (apparently, one could start with a big block of wood, but that gets expensive and you almost always find cracks once it gets up to certain size) and sketched out her face. His method is to start with the profile because that gives you a better sense of the puppet’s point of focus – which is what will ultimately give it life (as Judd put it, a puppet really doesn’t have anything but the ability to ‘look’ at things, so it needs a solid focal point.) We also went over some ergonomic considerations: a puppet needs to move easily and naturally in the puppeteer’s hand and its focal point should be immediately apparent just from holding it. Otherwise, the puppeteer has to spend a lot of time and energy just making sure it’s looking in the right direction. Once he was happy with the rough design, he cut a basic shape on the bandsaw before settling down to carve in the face, but only after marking out on all sides where certain features such as eyes, nose and chin, line up.
I guess something stuck from the lesson, because I found carving my third body much easier than the first two. Maybe it helped that I followed the proper procedure? At any rate, I was done much sooner then expected and ran out of elf parts to work on.
Peter needs to carve more hands and faces before we can proceed, so I was put on toy duty. I am to make a set of alphabet blocks. Simple, classic, giant ABC blocks. I don’t think this will be too tricky, but I figured it would be a good chance to practice my carving. So I cut 4” squares out of 2x6s and laminated them together. I was hoping to just be able to use 2x4s, but 2x4s aren’t actually 2” by 4”, because that’s the pre-milling size. Once we get them they’re actually 1 ½” by 3 ½” which is a really awkward size to make something that’s 4x4x4. So I glued three boards together with the intention of cutting them down since they’d have to be squared off anyway.
While that was setting I made a stencil for the letters by tracing giant letters off of my laptop screen and cutting them out. I got the blocks cut down to size and spent a few hours drawing on all the lettering and edging before showing them to Judd. Which was a mistake. Because he noticed right away that my cubes weren’t really cubes – more like 3-dimensional trapezoids.
I tried to argue that the odd shapes were charming and quirky and didn’t get away with it. I knew he was right, I just didn’t want to put the work in to fix it. But I did. I chopped them all down on the table saw (only a slightly scary process since the table saw only raises to about 3″ – but it seemed like a more finger-safe option than the chop saw) and now they are lovely 3 ½”x3 ½” x 3 1/2 cubes. The irony of which was not lost on me. I didn’t get as far as I wanted to with the blocks (they’re just friggin blocks, right? That’s a project for an afternoon!) but I got everything drawn out and I’m planning on getting them all carved out tomorrow. It should only take me a few hours, so I’m looking forward to exploring a bit of Calgary tomorrow afternoon.